|
|
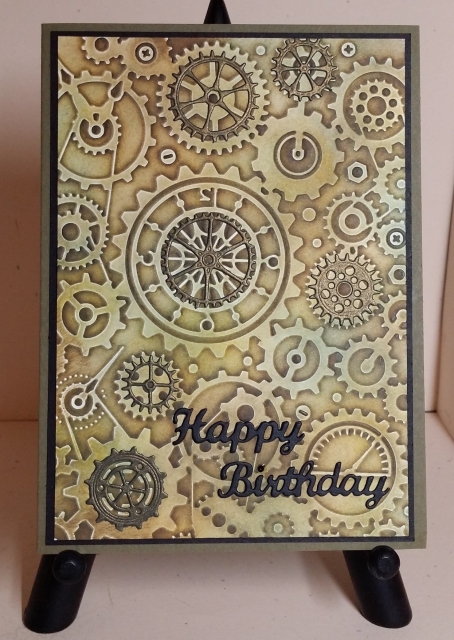
Cuttlebug Clockworks & Faux Patina
|
About four years ago, Nora and I got together to try out the Faux Patina Technique Angie Leach demonstrated in this video tutorial on Splitcoaststampers: http://www.splitcoaststampers.com/resources/tutorials/fauxpatina/. [splitcoaststampers.com]
I posted the backgrounds and the directions in April, 2014. https://www.scrapbook.com/galleries/13464/view/4937925/-1/72/0.html
I loved this background so much that I stopped after applying the inks and did not use any embossing powder on it. I used Distress Inks to make the faux patina piece. I sponged Mustard Seed all over as a base to warm up the other colors. Then I added Frayed Burlap, Gathered Twigs, and Stormy Sky. Lastly, I very lightly added Walnut Stain. Finally, I am using the background to make a birthday card for my son.
The only stamping on this card is the sentiment on the inside.
CARD:
4 ½” x 6 ¼” (A6)
Gina K. Designs Dark Sage Cardstock (card base)
Stampin’ Up! black cardstock (mat)
Neenah Classic Crest Solar White cardstock (embossed faux patina piece)
Unknown gold/green shimmer paper, not cardstock (die-cut gears)
Sookwang double-sided adhesive (attached to the shimmer paper before die-cutting)
Distress Inks
Cuttlebug Clockworks embossing folder, 5x7
Memory Box Gearworks Border Die, 90962
Elizabeth Craft Designs Happy Birthday die, ECD 717 (doubled)
Swarovski rhinestone, Cosmo Jet, SS5 (to dot the “I” in “Birthday”)
TFL.
Daria
|
|